My electricity bill these past two months has been frightening. Living in a building with only two units that is considered a "house" by ConEdison's standards, my roommate and I have had to pay double the monthly amount of typical apartment tenants. And it doesn't help that we have three air conditioners. We try to use them a little as possible, but with July's record high temps and oppressive humidity, a little AC meant the difference between good night's rest and no sleep.
And of course, I can't not cook at home. As somewhat of a carb addict, 75% of my homecooked dinners, let's just be honest, involve noodles or pasta. But the noodle soups will have to wait until fall.
Cold noodles, on the other hand, are essential for the summer. They make great picnic food. They make great sides for cookouts. They are the same savory-sweet kind you get from the Chinese takeout, with less grease and no MSG. And they require very little prep time and don't even have to be reheated out of the fridge (within a reasonable number of days, of course.)
For the noodles themselves, I like to use Chinese egg noodles, soba, or spaghetti. They should be round, not too thin or too thick (the width of a spaghetti strang is perfect.) I find that regular all-wheat Chinese noodles are usually too spongey for this sauce, rendering the dish into somewhat of a gloppy mess. Same with rice noodles. Egg noodles, soba, or spaghetti hold their firmness the best, and allow the sauce to coat the noodles instead of seeping in.
I also like to sauté my garlic and ginger just a little, before tossing it in with the sauce. I'd rather have fragrant garlic and ginger instead of raw, and that extra step of sautéeing for 30 seconds makes a huge difference.?
_______________________________
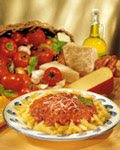
Cold Sesame Noodles
Serves 4 as a main or 6 as an appetizer
12 ounces dried Chinese egg noodles, soba, or spaghetti
2 tablespoons peanut oil
2 teaspoons minced garlic
2 teaspoons grated ginger
3 tablespoons Chinese sesame paste (or 3 tablespoons tahini with an extra teaspoon of sesame oil)
2 tablespoons smooth peanut butter
2 tablespoons sesame oil
2 tablespoons soy sauce
2 tablespoons water
1 tablespoon Chinese rice vinegar
2 teaspoons chili sauce
2 tablespoons sugar
1 cucumber, peeled, seeded, and cut into matchsticks
2 small handful peanuts, chopped
2 scallions, green parts only, thinly sliced for garnish
1. Bring a pot of water to boil and cook egg noodles or spaghetti until just done and still firm, or the minimum amount of time according to package instructions. Drain immediately, rinse with cold water, and drain again. Toss with 1 tablespoon peanut oil and set aside.
2. Heat the other tablespoon of peanut oil in a small pan. Stir-fry the minced garlic and grated ginger until just fragrant, about 30 seconds. Set aside.
3. In a medium bowl, whisk together the sesame paste, peanut butter, sesame oil, soy sauce, water, Chinese rice vinegar, chili sauce, and sugar until smooth. Stir in the garlic and ginger.?
4. Pour the sauce over the noodles, add half the cucumber matchsticks, and toss. Transfer to a serving dish and garnish with the rest of the cucumber, the chopped peanuts, and the scallions.?
___________________________________
More noodle dishes:
Dan Dan Mian (Spicy Sichuan Noodles)
Noodles with Hot Bean Sauce
Minced Pork and Shiitake Soba Noodles
Pad See-Ew?
Stir-Fried Vermicelli (Rice Noodles) with Garlic and Scallions
Red Curry Peanut Noodles

 Angus Beef Burger with Spicy Sambal Sauce (pictured left, half-eaten) - This is very, very spicy. The burger meat was a teeny bit dry, but hard to notice under the amount of sambal sauce. My lunch date drank a lot of water.


 Shrimp Sinigang pictures (1 of 2)
") Ginger and Clam Soup (姜丝蛤蜊汤) pictures (1 of 3)
Ginger and Clam Soup (姜丝蛤蜊汤) pictures (1 of 3)")
 Malaysian Banana Pancake with Lemon Coconut Curd pictures (1 of 4)
 Salmon Teriyaki pictures (1 of 3)

 Spicy Chicken with Cashew Nuts pictures (1 of 3)